Whitelabeling Your Platform
The entAIngine platform enables developers to fully whitelabel their applications by customizing the appearance for their end users. This feature ensures that the platform reflects your brand identity, offering a cohesive and professional experience to your users.
Key Customization Options

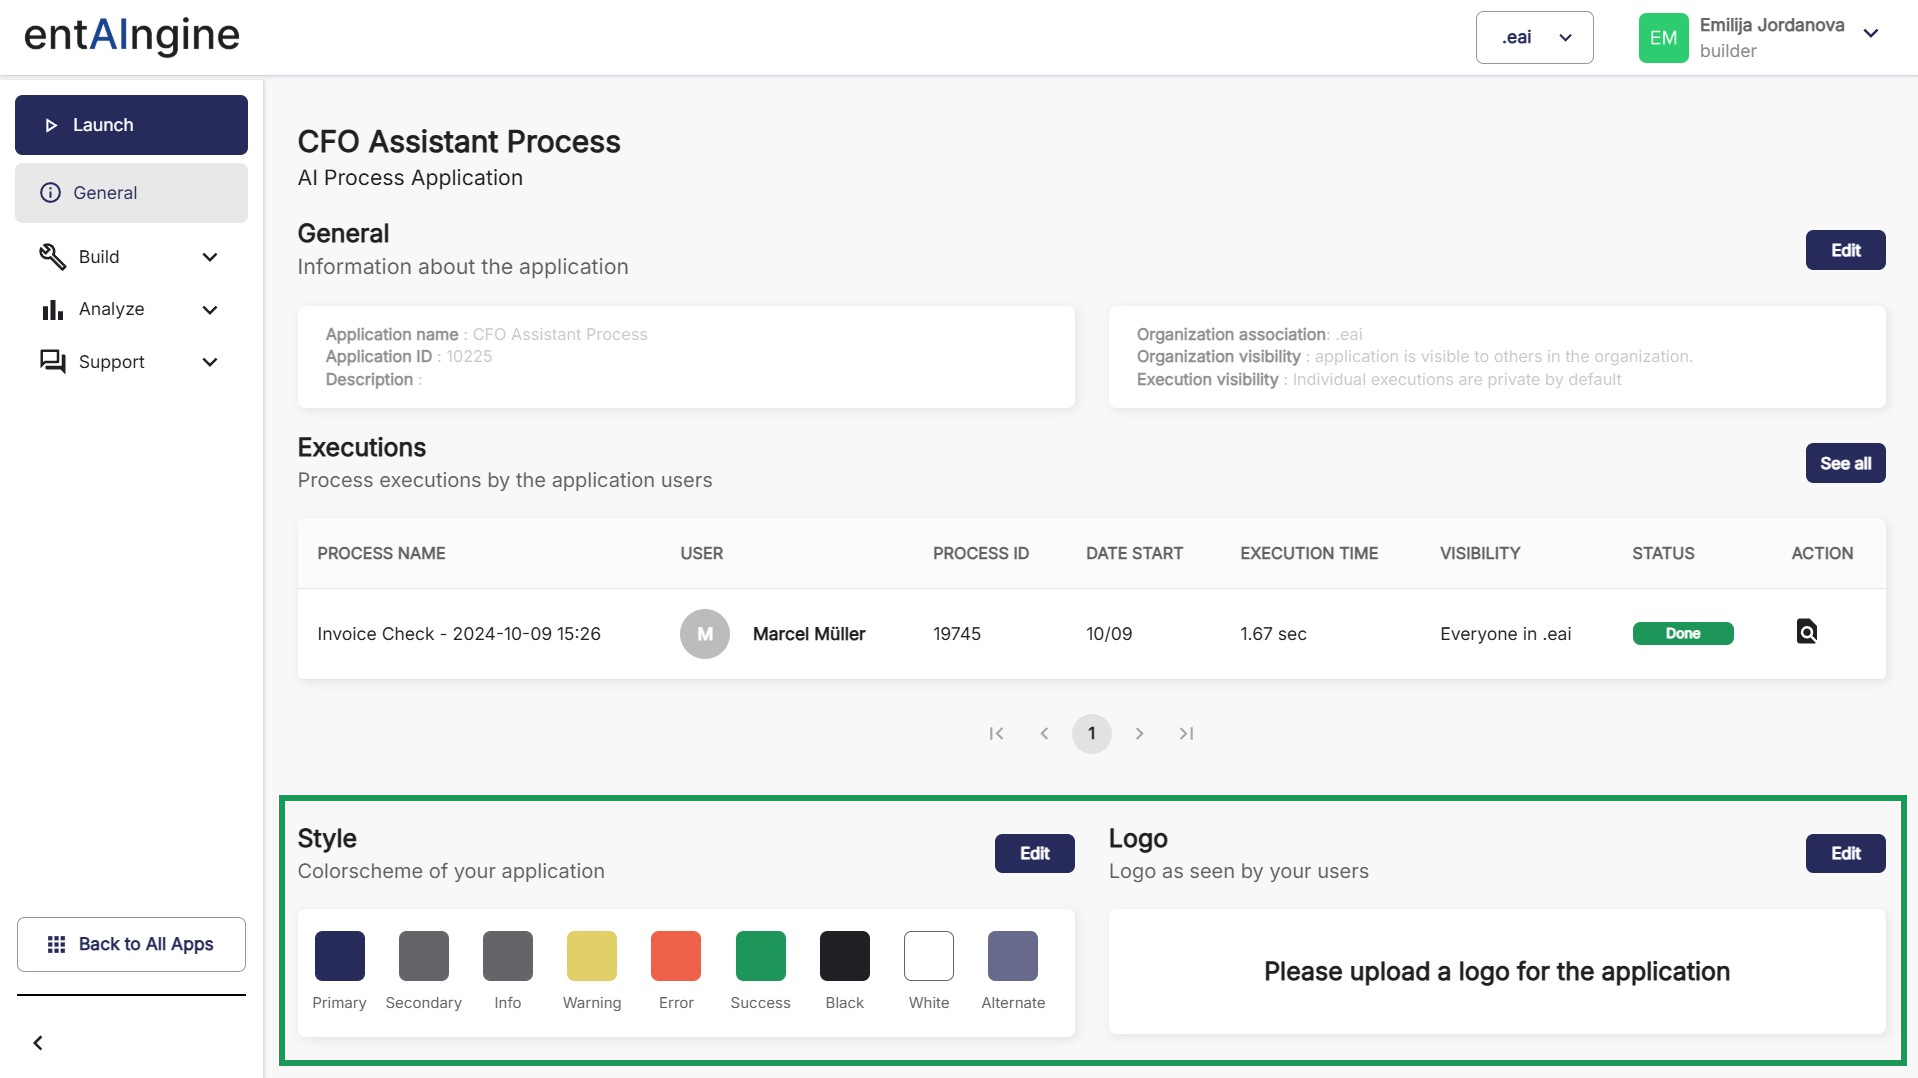
Style Section
In the Style section of the dashboard, you can define your brand's color scheme for various UI states:
- Primary: The main action or highlight color.
- Secondary: Supporting or less prominent actions.
- Info: Informational messages or highlights.
- Warning: Cautionary messages or notifications.
- Error: Error messages and critical alerts.
- Success: Indicators for successful actions.
- Black: Neutral or dark-themed elements.
- White: Neutral or light-themed elements.
- Alternate: Optional accent or alternate colors.
These colors will be applied across all pages and interfaces that your end users interact with, ensuring a seamless and consistent visual identity that aligns with your brand.
Logo Section
In the Logo section, you can upload your company’s logo. Once uploaded:
- The logo will appear in the top left corner of the platform.
- It will be visible to your end users across all pages and interfaces of the platform.
This helps to reinforce your brand identity throughout the platform.
End-User Experience
When your end users access the platform, they will immediately see your logo and the customized color scheme. These elements will be present throughout the platform, providing a fully branded and professional experience. From the moment they log in to when they navigate through the various sections and features, your branding will remain consistent and visible.
How to Configure
Editing Colors in the Style Section
- Navigate to the Style section on your dashboard.
- Click Edit.
- Select colors for each state:
- Primary
- Secondary
- Info
- Warning
- Error
- Success
- Black
- White
- Alternate
- Save your changes to apply them across the platform.
Uploading a Logo in the Logo Section
- Navigate to the Logo section on your dashboard.
- Click Edit.
- Upload your logo file (supported formats: PNG, JPEG, etc.).
- Save your changes to update the logo visible to your end users.
Summary
By customizing both the color scheme and the logo, you ensure that your platform feels uniquely tailored to your brand, creating a cohesive experience for your users.